Thursday 14 October 2010

Lizardmen Finished! (For the time being)

Hi gang,


well as the title suggests I've finished up painting the Lizardmen Battalion I purchased years ago, but which I only started painting maybe a month and a half ago. I had left the Cold One riders to last as they seemed like the most complicated unit, and thats what they turned out to be. I really struggled with finding a colour for the Cold Ones that I was really happy with, and eventually settled on the colour I had used on the skinks for their skin, and a grey colour for their boney crests. The riders were painted in exactly the same manner as their footslogging collegues, the only difference being that I went with red on their shields as I felt that the shields would blend into the Cold ones otherwise if I stayed with the blue. 
Cold One Riders Headlong Charge!

Cold One Riders Profile Shot
That unit polished off the battalion, but I did have a Lizardman hero which I wanted to paint to make this mini army at least playable if the situation ever arose. I did not spend too long on him and painted him to the same standard as the rest of the Lizardman army. He was taken from basecoat to varnish in a single day.


So that mini finished off my Lizardman experience for the time being. I took a couple of photo's of what I've painted over the last two months.
Overall Lizardman Army

Hero and Cold One Riders
Skinks with Blowpipes and Sauras with Hand Weapon and Shield

Skinks and Sauras with Spears
I'm very happy with how they have turned out, I really like my Sauras colour scheme and think they look very unique and striking.

Next project? Vampire Counts, starting with 60 zombies!

Friday 8 October 2010

Large Scale Marine Update

Hi all,

its been a couple of weeks since I updated this blog, but I have got quite a bit of work done on the large scale marine mini from forge world. I undercoated the mini with army painter black, used vallejo masking fluid to block off the face and  airbrushed the whole head with boltgun metal.This was then followed by spraying the helmet with matt varnish and when dry, sprayed with hair varnish. When that was dry I then airbrushed the helmet with Iydanden Darksun.

First Iydanden Darksun Basecoat
Then using a brush with warm water I set about "distressing" the helmet, the warm water melting the hairspray underneath and removing the yellow paint in an organic sort of way.


Battle damaged yellow
  I then set about adding details such as highlights to the scratches and colours into the recesses using forgeworld weathering powders.


Battledamage/weathering effects
I then scraped off the masking fluid from the face and set about painting it.

Finished Face
I also finished off the working eye with green.

Finished Eye

Overall Head
I've started the legs, I wanted to add rivets to the legs and set about this by cutting the heads off of some nails I found in the garden shed and gluing them into holes in the legs which I created with my drill bits and knife. I also masked the knee pads with the Vallejo masking medium. All set for painting like the helmet.

Legs Front

Legs Back
So lots of photos! I'm looking forward to getting these legs painted, adding the rivets turned out to be really time consuming. and it will be nice to get some paint on them.

In the mean time I have also been working on the Lizardman Battalion but I am having trouble trying to find the right colour scheme for the cold one riders. Once I get that sorted I should be able to finish off the unit fairly quickly.

Until the next update, keep painting.

Wednesday 8 September 2010

Large Scale Marine Sculpt

Hello gang,

I am also working on construction of the large scale FW marine which I got last christmas. I wanted to show some battle damage and as such took a knife to the helmet and started gouging away.


Space marine head

The black marks are just general guidelines where I want the cheakbones, eyes, nose and mouth to be. I broke out the milliput yesterday and did my best with the sculpting.
Sculpted face
Its not going to get me a job sculpting anytime soon, but I'm happy with the result. More updates soon!

Friday 3 September 2010

More Saurus

Hi all,
just a quick update to let you guys know I've finished the second unit of Saurus that came in the battalion.  I've equipped this regiment with spears.

Second Saurus Unit
So this is what I've painted from the battalion so far.

Two Saurus and one Skink units

Next on the list is the final Skink unit from the box set, and then finally onto the cold one riders. I also am after getting an email from forgeworld announcing their next IA release. They are only going and releasing a Badab IA! A definite purchase for a Lamenters collector like me. Here's hoping for Lamenter models/upgrade packs/shoulder pads and more indepth fluff.

Until next time keep painting!
Vinny

Sunday 29 August 2010

Skinks anyone?

Hello everyone.

I started a unit of skinks on Wednesday. Firstly  I got rid of any visible mold lines and then blue-tacked them onto a piece of cork-board, and undercoated them with Choas Black.
Undercoated unit of Skinks
 From here I broke out my new airbrush. Then with a mixture of Vallejo Touquoirse Blue I gave the whole unit a basecoat.

Basecoated Skinks
 I then drybrushed the whole unit with Vallejo Dead Flesh

Drybrushed Skink Unit
 Then I gave the whole unit a wash with GW Asumeran Blue.

Skinks after wash
All these steps took me only an half an hour to an hour. From here I then worked on adding the details.

Scales: Vallejo Dead Flesh, Wash of GW Devlan Mud
Metals: GW Tin Blitz
Eyes:GW Iydanden Yellow
Base: Scorched Brown Basecoat, Drybrush of Bleached Bone, Scorched Brown Grass Flock
Teeth/Weapons: Dhedeb Stone, Devlan Mud
Head Crest: GW Mechraite Orange, GW Baal Red Wash, Mechraite Orange/Dwarf Flesh (50:50) highlight

So I finished up a full unit of skinks in 3 days, which I'm fairly happy about.
Finished Skink Unit
So the second unit of the Lizardmen Battalion polished off. Going to start the second unit of Sauras warriors today or tomorrow. I have to say I was delighted with how the airbrush worked out, it really took a lot of the donkey work out of getting the inital coats of paint down on the models. I'm going to use it in future to get this time consuming section of regiment painting done.

Until next time, stay painting,
Vinny


Sunday 22 August 2010

My first Painted WFB Regiment

I've done it! As the title of the blog says, I've managed to paint a WFB regiment for the first time in my life. In fairness though I wasn't trying too hard previously, this being my first proper attempt at it.

So two post ago I had outlined the constructing and basing of the Lizardman Battlation I had purchased a couple of years ago. Well I got the colour scheme down, and over the last week got settled down and painted it up. The scheme is easy enough to allow me to paint fairly fast.

Skin:
GW Foundation Macharius Solar Orange, followed by a strong wash of Baal Red
Scales:
GW Foundation Fenris Grey, drybrush of Game Colour Dead Flesh, followed by a strong wash of Baal Red
Metals:
Tin Blitz
Sheilds and Totem:
Game Colour Falcon Turquoise, drybrush of Game Colour Dead Flesh, strong wash of GW Asurmen Blue
Bone/Teeth/Weapons:
GW Foundation Dheneb Stone, strong wash of GW Devlan Mud
Base:
GW Scorched Brown, drybrush of Game Colour Bonewhite

So as you can see absolutely nothing fancy whatsoever in terms of technique, but I am very happy with the way the unit turned out, and God knows if I am to make it through painting the whole Battalion I need a quick and easy painting method. Anyway onto pictures.


Next up Skinks!

Monday 9 August 2010

New Toys

Just a quick update to show you guys what arrived in the post for me today. Purchased from Maelstrom for around 100euro.

Whats in the Boxes?    
Vampire Counts thats what!
 From left to right, the army book, Avatars of War Vampire blister, the battalion, Mantic Undead box set, Avatar of War Necromuncer blister and Gamezone vampire knight blister.

Now to juggle these with the Lizardmen I started in the last post.

Monday 2 August 2010

I'm Back!

Hello gang!

Yes I'm back, I apologise for the lack of hobby updates for the last three months, but I have a very good reason. I went on a trip. Myself and the girlfriend had just finished college, and we decided to head off for a couple of months. So after a trip through Russia, China, Australia and New Zealand, I'm back looking for a job, and doing hobby related stuff again.

While I was away I did pick up the new edition of WFB, (turns out the rulebook is more expensive in New Zealand than home) and got inspired to get cracking at some of the WFB models I have hanging around here. Maybe it was the long lay off from hobby related stuff but I've been working flat out on mini's for the last two days. 

The first thing I did though was move all my hobby gear out of my tiny bedroom at home and took over a spare room. I figured I might be home for a while so why should I be hunched over a fold up desk in my sleeping cupboard? Why not have a place with plenty of light and space, and somewhere to chill out and read and practice guitar?
  My new hobby desk/table with plenty of storage and display shelves

 Chill out/reading area

 A clean hobby table!

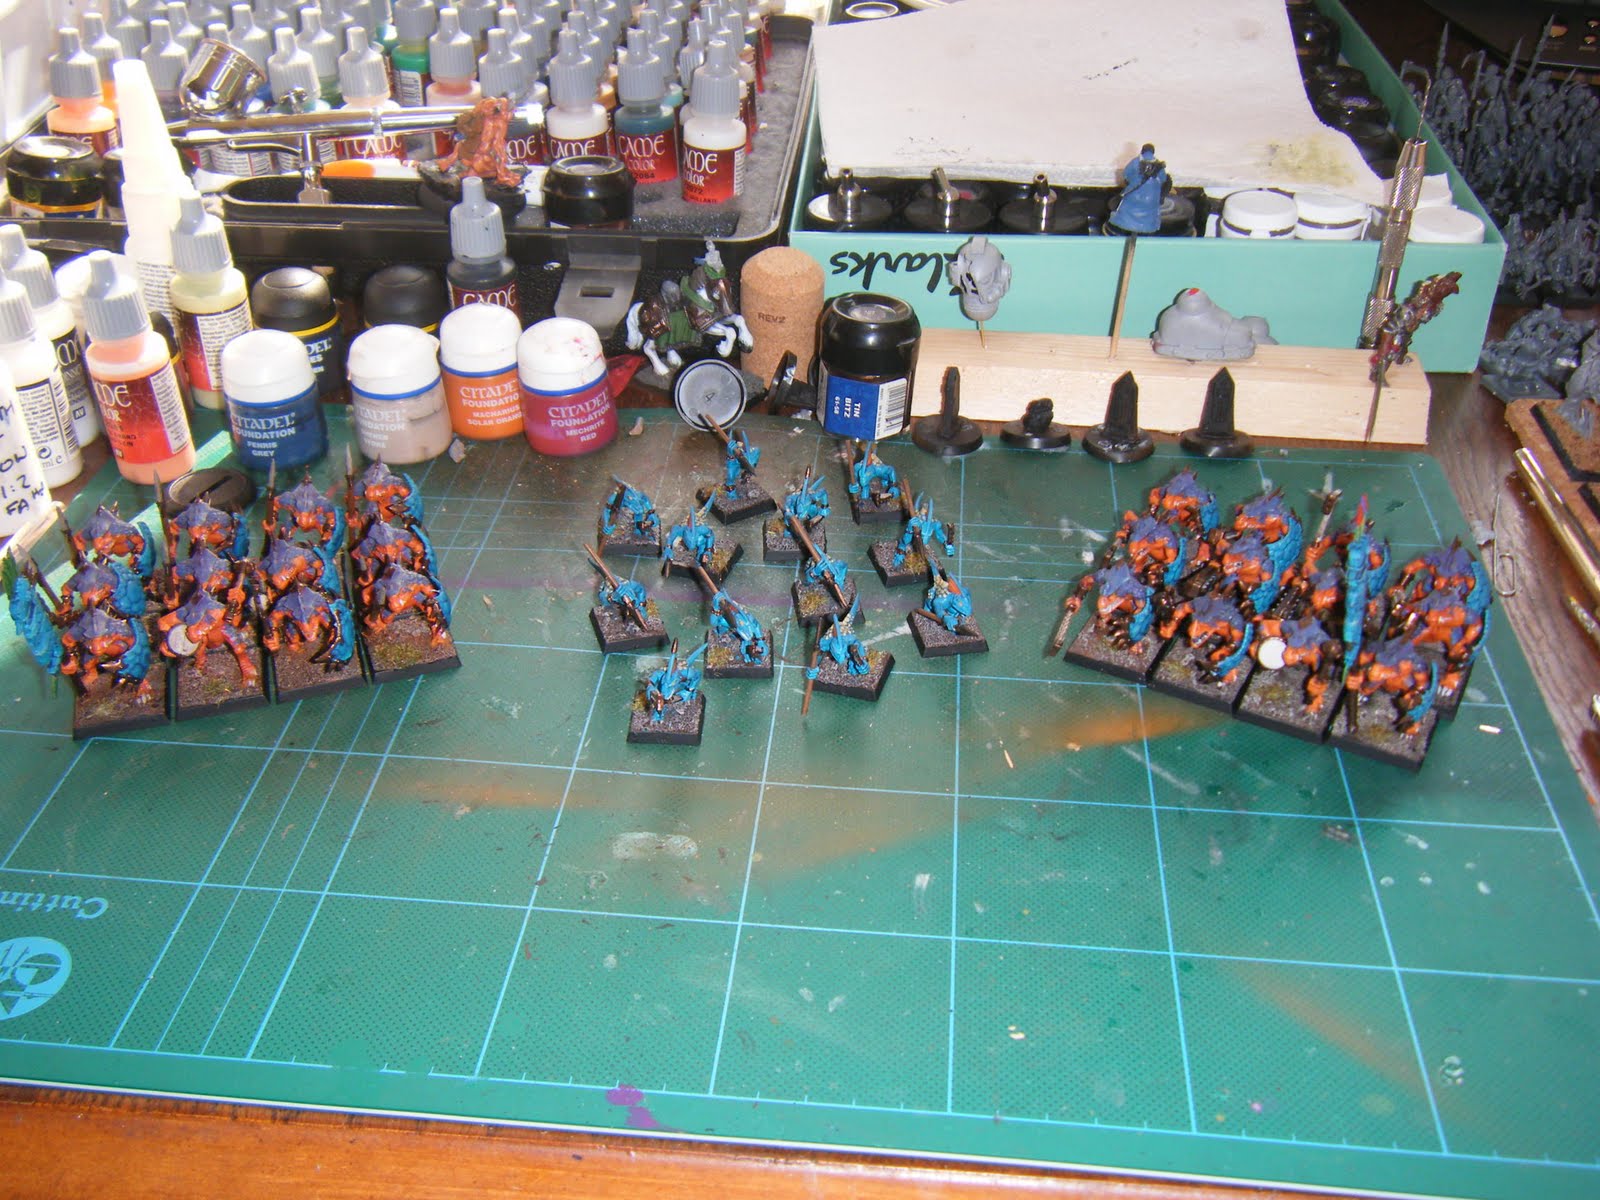
So the first thing I set eyes on yesterday when I sat at my new hobby table was the Lizardmen Battalion I had bought a couple of years ago but had done nothing with. So I broke out the clippers, superglue and hobby knife and got gluing.

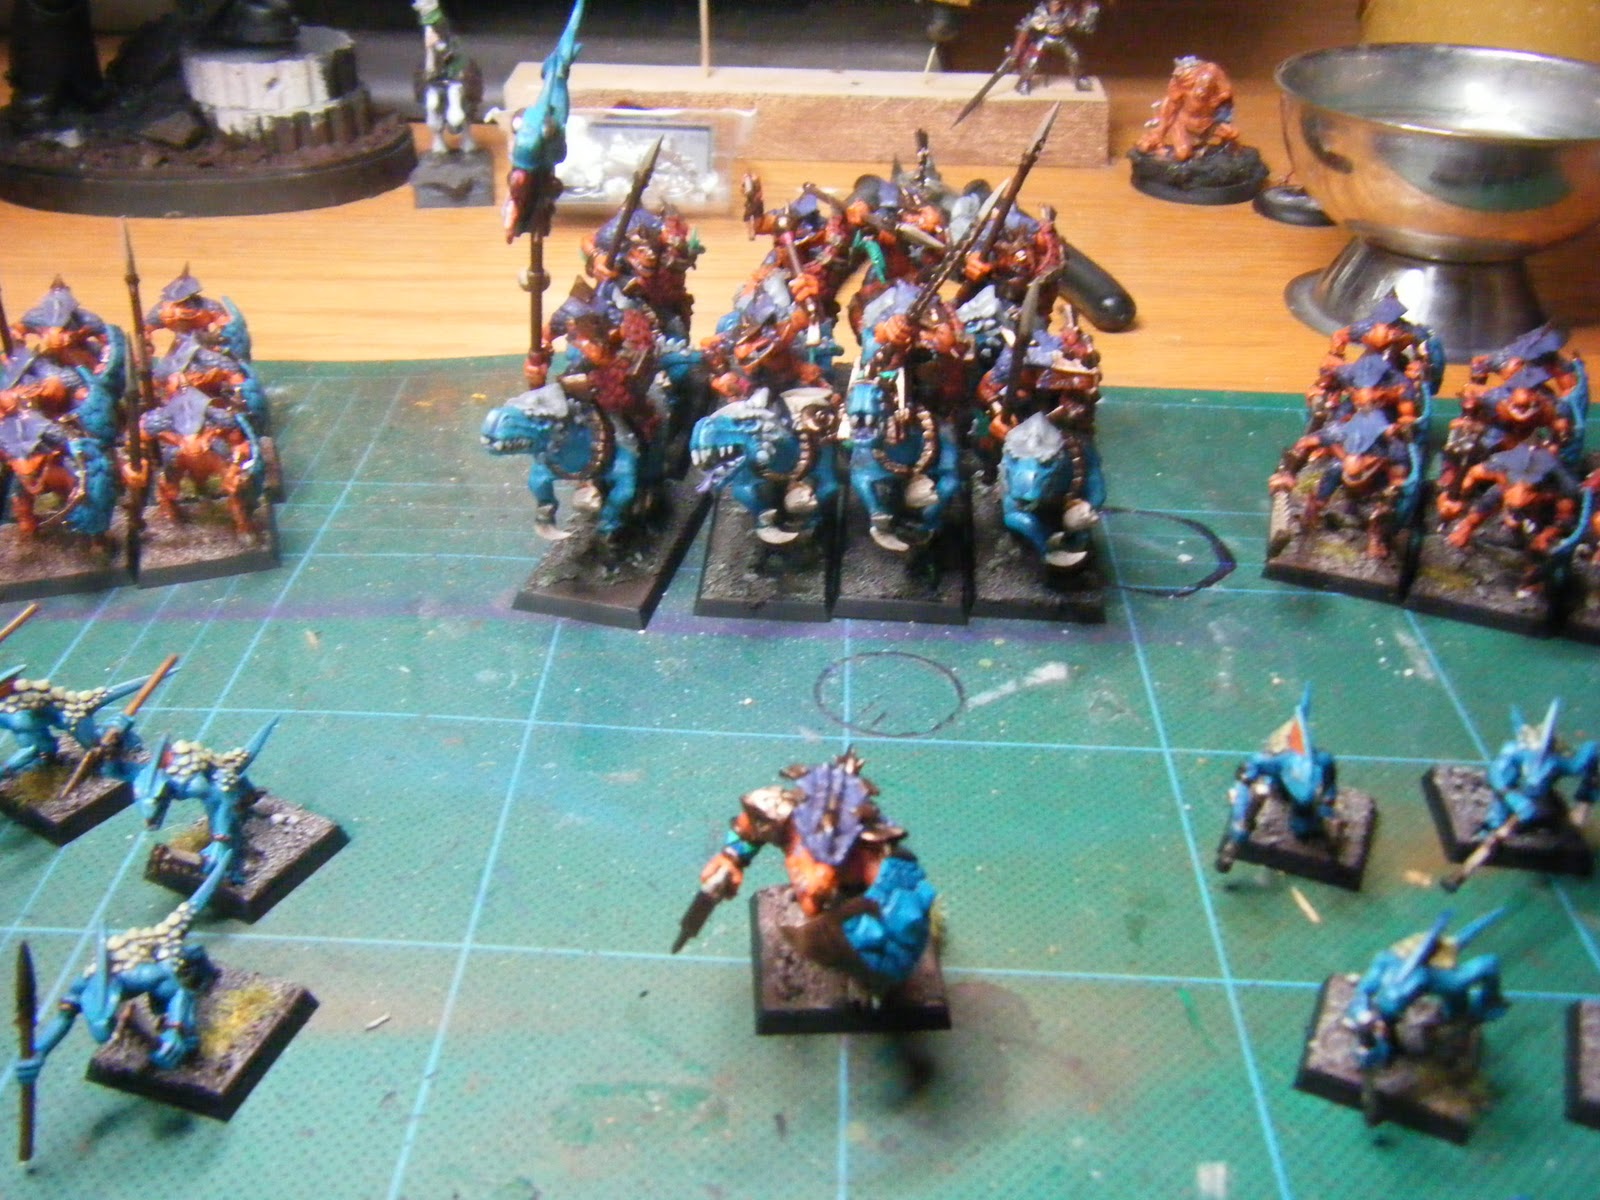
 A couple of hours later........a full lizardman battalion + lord choice.

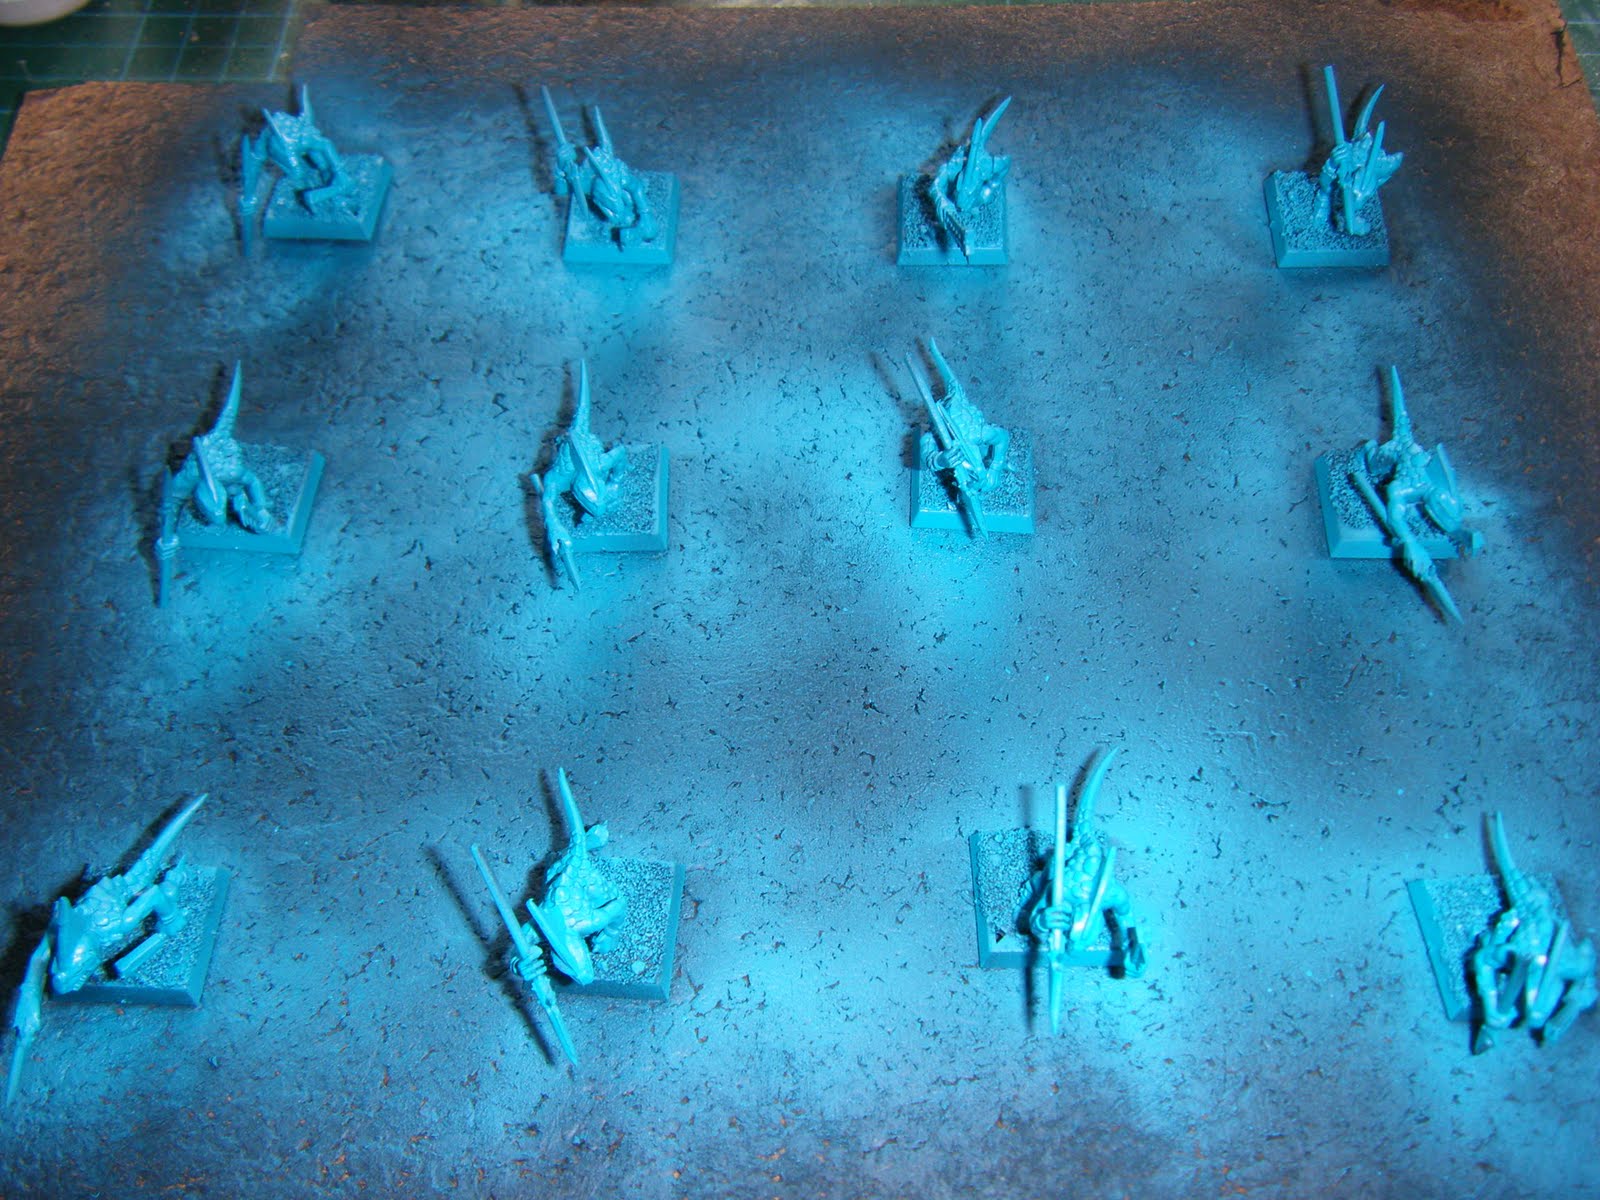
This morning I got up and spent an hour or two basing them in a nice little conveyor belt system I set up.
 The silver pot contains 50:50 mixture of PVA and water, which is brushed onto the base, then the model dunked into the sand, the lose sand removed and left to dry on the tissue. Once the whole battalion was based I went back and gave them all another coat of PVA to seal the deal so to speak.

I have a colour scheme worked out, which you can see in the second to last picture. Tomorrow I hope to get started on the painting.

Until the next update, stay painting,
Vinny

Thursday 8 April 2010

Inital Airbrushing Impressions

Hi all,

So i've been playing around with my airbrush and so far its been a fairly steep learning curve. The pressure setting on the compressor was the inital varable I was focusing on. The compressor seems to be able to give me anywhere between 5 and 60psi, which from my reading online is more than what I need for hobby airbrushing. From there I have been focusing on the gravity feed airbrush, this airbrush has a 0.3mm nozzle. Some blogs and forum topics have recommended a 0.25mm nozzle, but I'm happen enough to use this size for the time being to get some experience using this nozzle. 

I practiced airbrushing by basecoating the base of the forgeworld large scale marine with black.
 I think it worked pretty well. The main thing for me it seems is that I need to get the proportion of paint to thinner right. I've had problems with the paint being too thin when I applied. I pressume this will come with time and practice. The red marks were used for the pinning of the feet to the base, while the resin showing through happened when I was doing said pinning. I'm going to continue doing the ground work with the airbrush, next up some brown paint.

Finally I came up with what I think was one of my greatest idea's.

A piece of wood with holes in it you say? I was having a problem with holding my mini's in between painting, so one piece of wood which had a quick run in with a drill later.............

So once a mini is pinned and when I want to use both my hands, in the mini goes to the piece of wood.

Onward and upward from here!

Monday 5 April 2010

My New Airbrush

Hi all

I got a brand new toy today! What I got inside the cardboard box.


The gravity loaded double action airbrush.


The second airbrush that came in the pack, a suction double action airbrush.


Unpacking the compressor.


And when its fully unpacked.


So as you can see its a nice compact compressor, not even taking up a full A4 pad. I've turned it on and its lovely and quiet. I won't be bothering anyone with it thats for sure. I've had a go at getting both airbrushes connected to the compressor and did a little spraying with water to get a feel of the double action. I also figured out how to change the pressure on the compressor, after a little bit of panic, when a spring got lost! Tomorrow I'll have a go at airbrushing in earnest by starting with some paint on plasticard.

Tuesday 30 March 2010

Friday 26 March 2010

Painting a White Horse

Hi gang!

I am really sorry about the quantity of updates I'm putting up here. I did intent to have more posts, but it turns out you can only post to a hobby blog when you do hobby related stuff, or more accurately "interesting hobby related stuff". Browsing CMoN does not a hobby blog post make! As I've said before,I've  moved home, but I'm actually spending weeks at time at my girlfriends, hence only dribs and drabs of hobby content. 

So I've been very slowly working on the horse which I showed pictures of in my last blog, this included a couple of green ink washes on the barding and the inital basecoat for the gold detailing on the armour. The most serious work I have done though is on the horse's coat. This is only the second time I've ever made a serious attempt at painting a horse. The first worked out ok, not great, just ok (I'll post a picture some time, as I also have to finish that mini!). Painting this horse is cheating really though as he's mostly all legs and neck, none of that tricky stomach/arse area. 

I begin with a basecoat of GWF Astromican Grey. This was followed by several thin washes of Vallejo Cold Grey applied to the shadow area's (under the armour), inside the knee joints and the depths of the leg and neck muscles to build up the shadow. 
The first highlight was achieved by mixing 3 drops of Vallejo Cold Grey to 1 brush load of Privateer Press White and 1 drop water and painting onto the definied muscles. When this was painted a second brush load of PP white was added to the paint mix along with a second drop of water to keep the consistency. This was layered onto the muscles. White paint and water in the same volumes were added a third time and once again layered onto the model. A final highlight of pure PP white was then applied. 
Ah! Thats about it for the update really. I would love to hear from anyone who might have a suggestion on how to improve the white. To date its probably the smoothest and nicest white I've managed to paint, but I'm always ready to hear tips on how to improve myself as a painter.

Monday 15 March 2010

Horsey Bases!

One of the thing I've decided I need to work on is the basing of my mini's. Up until now they have been the standard PVA/flock combo, which does not really cut the mustard for the display mini's I hope to paint at some stage in my life. So I need to get practicing on improving my basing techniques. To that end I've attempted to make a start on the base of my Empire leader, which I showed pictures of when I first started this blog.

So these three pictures show what I've done. I'm trying to show a grassy overhang on a rocky slope. The rock was made out of some cork board, and the slope created from standard milluput, with a skull pushed into it. Hopefully by paint and the placement of flock will make this look a little more interesting than a normal base.

Related Posts

Related Posts Plugin for WordPress, Blogger...

Search This Blog